New Mini Pond
During my spring cleaning I found out, that my mini pond is half empty and my water lilies are high and dry. A cracked tub I had lined with black trash bag evidently couldn’t last more than 5 years. Oh well, time to do something better.
MAY 6, 2020
Mini Pond Selection
I did a quick online mini pond research and found the best shape and price for me. But somehow I forgot to evaluate the materials. When my dream plastic piece arrived two days later I was a bit disappointed with its size. I have underestimated it as well as its sturdiness. So it’s possible, that I will not have to wait even 5 years for the next one.
I can’t say that the size doesn’t matter. I was worried the mini pond would be too big so I chose Calmus SI . It is 4′ by 3′ and 16″ deep and takes 38 gal of water. But the size is deceptive and the new mini pond ended up not much larger than the old tub I had. On the other hand it saved me digging.
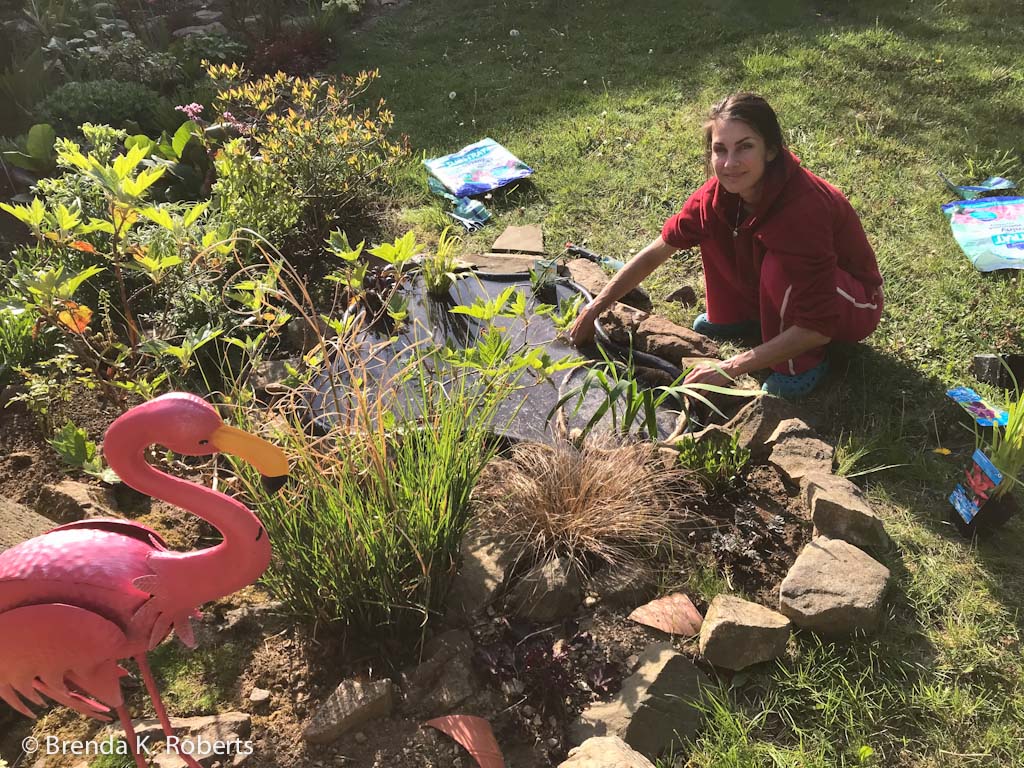
Setting the Preformed Pond
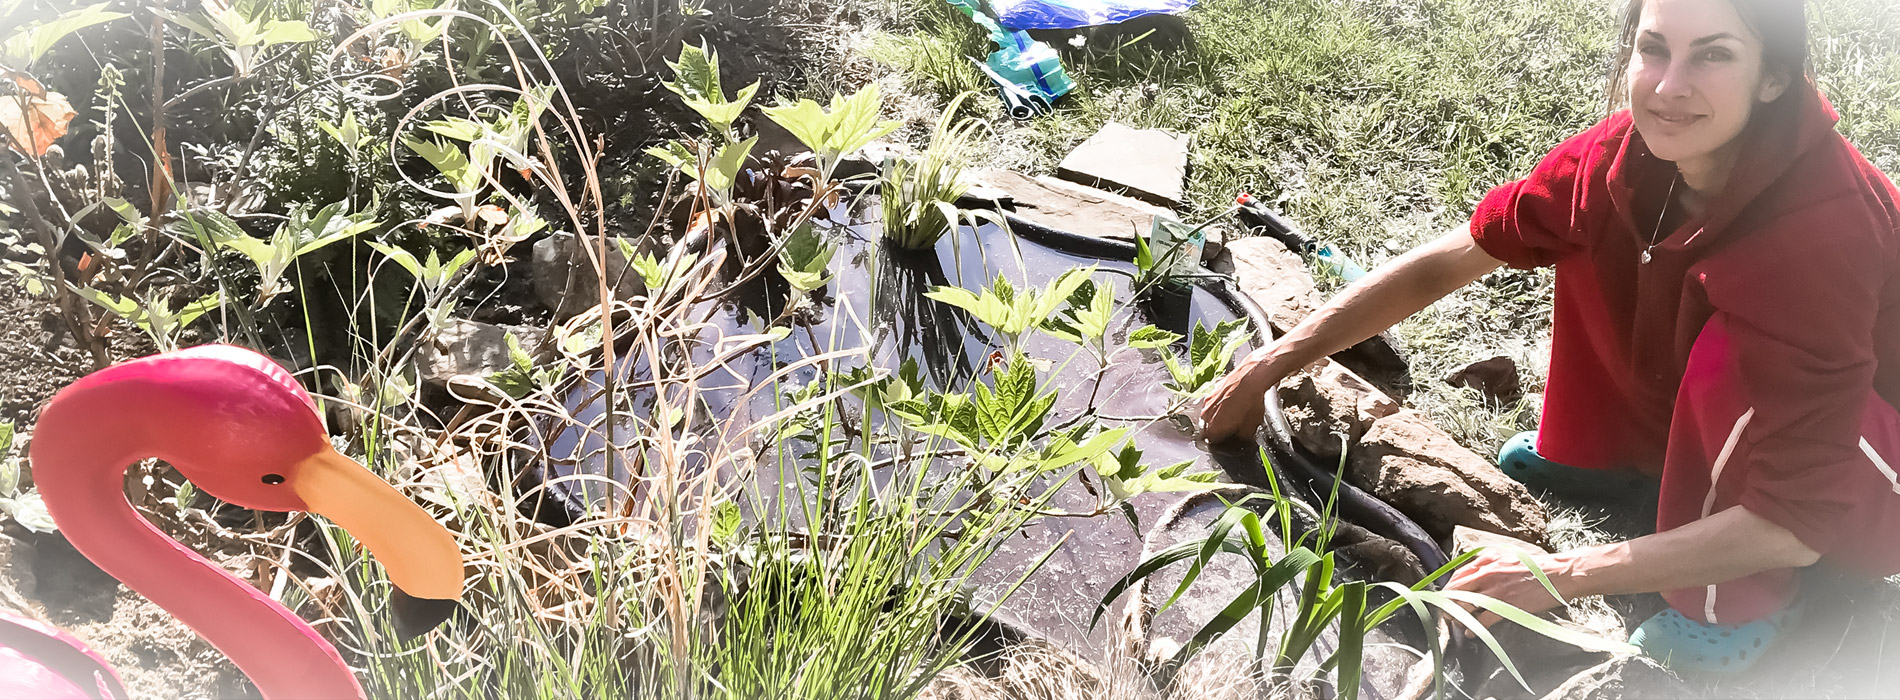
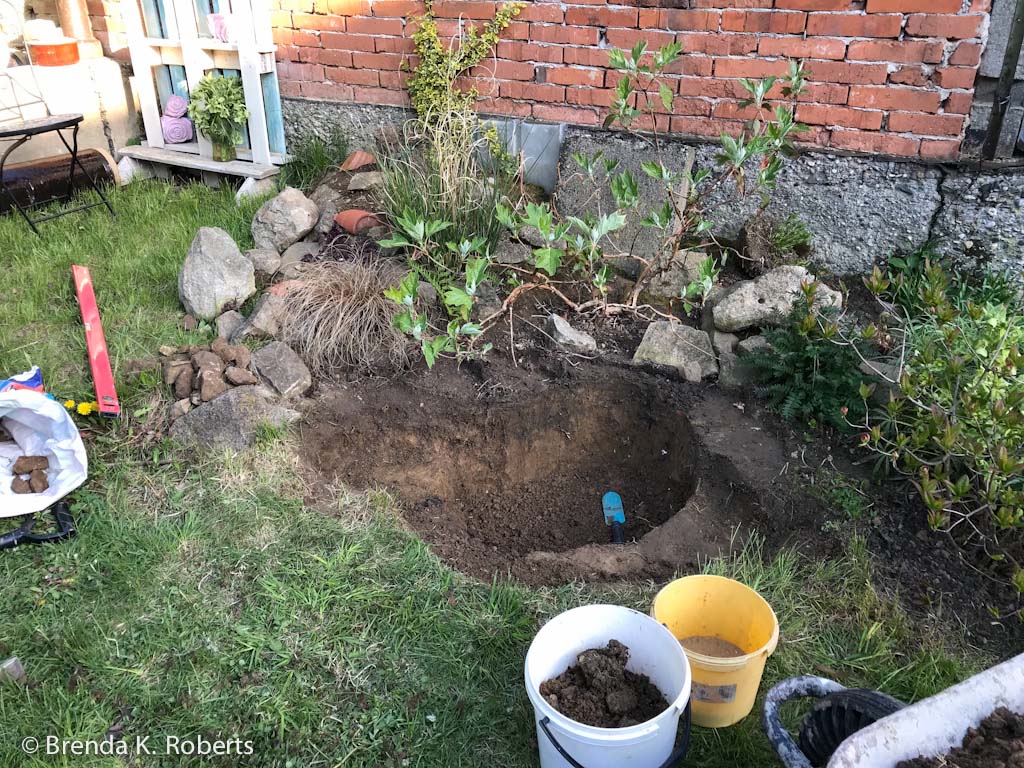
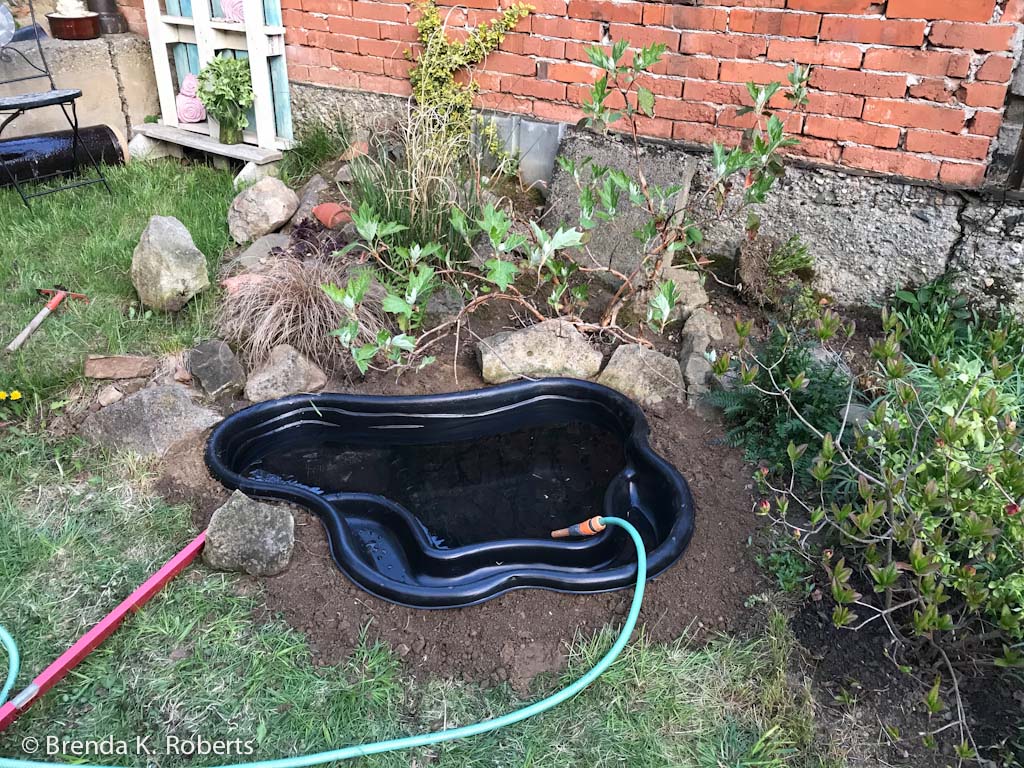
The hole left after the tub needed only small adjustments and we could continue. According to the instructions first we made sure the top edge of the Mini pond was level. Then we were filling the gap around it with sand and dirt, occasionally flushing it with water to settle. At the same time we were filling the pond with water so it would hold the shape. One of the very few projects that actually followed the time plan: 1 hour preparations, 1 hour digging, 1 hour setting and levelling, and 1 hour in and out filling. Nice afternoon project.
Planting
I have waited few days with planting for the water to stand. I bought 3 small bags of pond dirt so I could carry them and 6 assorted pond plants. First dirt went to the bottom, second into the jute bag in the middle and last one into the shallow edge. Of course I have read the instructions only after my pond started looking like a peat bog. Well, I was lucky there were no fish there, so dear strangers… The pond soil should go first into the bucket and then keep adding water slowly working the dirt into soft mud.
Note: after the acquired experience I don’t recommend using the pond dirt at all! Only water lilies really need pond soil in the baskets. Most of the other pond plants are just fine with planting in gravel. The roots will take nutritions from the water and keep it clean that way.
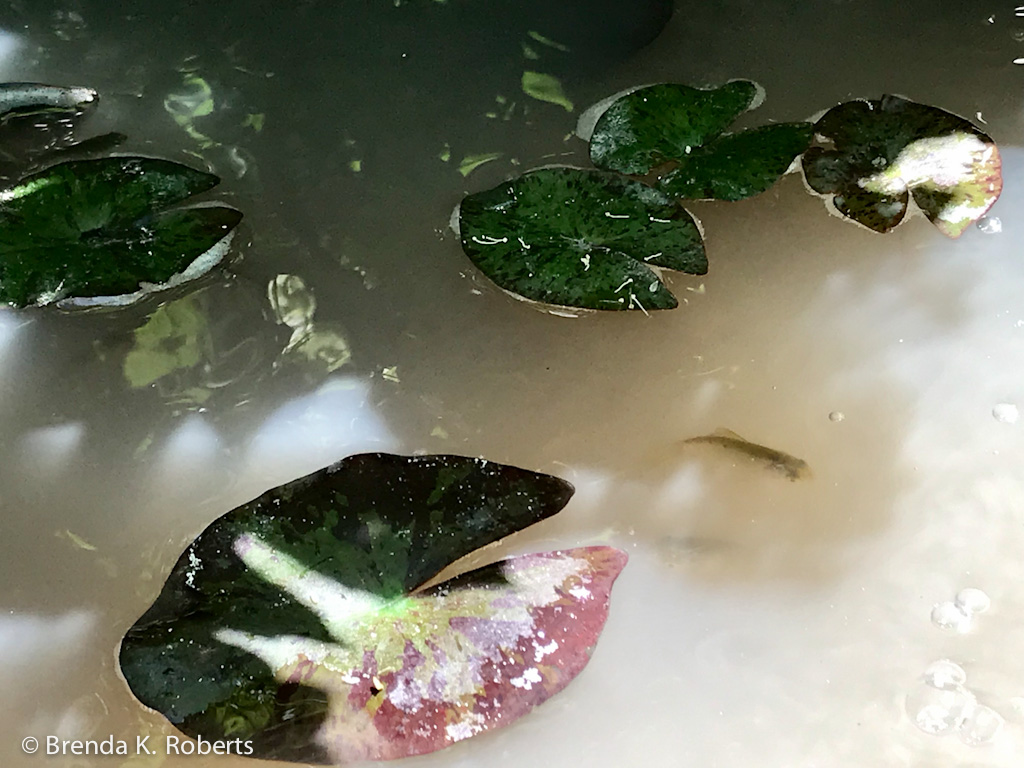
I have returned the water lilies at the bottom. Into the jute bag I have planted two japanese irises. The rest went into the shallows: Lobelia cardinalis, Acorus, Pickerelweed and Schizostylis coccinea. Unfortunately 2 weeks later the water was still cloudy so I’ve tried exchanging part of it.
Landscaping
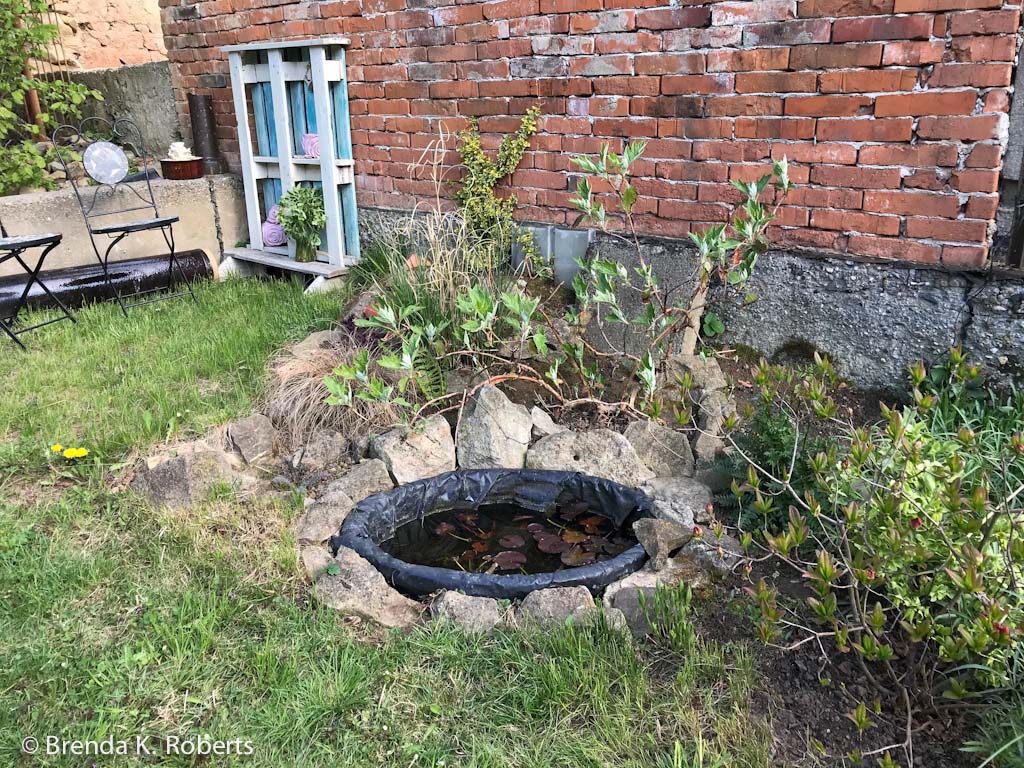
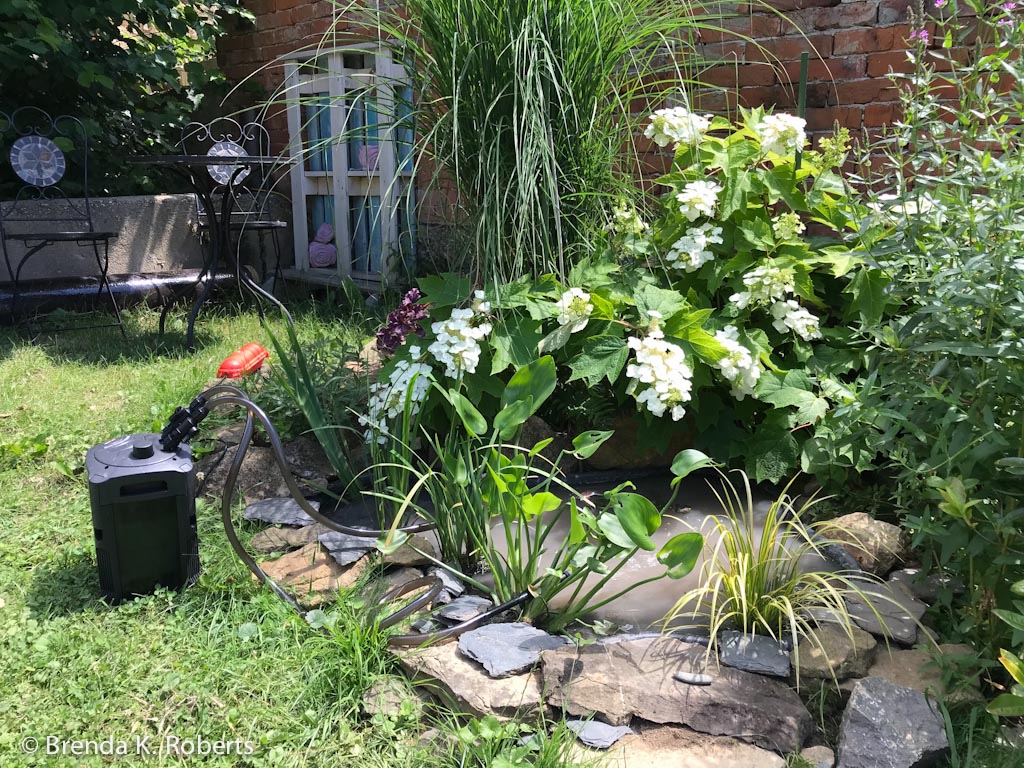
Finally I did some landscaping around my mini pond. I have planted and replanted what I could and decorated everything with stones. In the background you can see Hydrangea quercifolia with Miscanthus sinensis ‘Gracillimus’ and Aruncus dioicus. On either side I have put Polemonium caeruleum ‘Purple Rain’. On the right side also Amsonia tabernaemontana ‘Blue Ice’ in front of the Lythrum salicaria. Physostegia virginiana even further back and Azalea japonica ‘Cannons Double’ on the side. On the left I have put only Carex buchananii with Heuchera ‘Plum Royal’.
It didn’t take long and the water was swarming with mosquito larvae. As my friend was cleaning his pond at the same time I agreed to accept a handful of small fry. With a hope that one of them will grow gold and one day might fulfil my wish.
Revaluation
When the water lilies started sticking above the water resembling greater burdock I had to resort to a drastic step. I made a premature fish harvest and pulled the lilies out of the pond. Then I have carefully strained the rest of the water to save any forgotten fish and at the end I have scooped out all the mud from the bottom. For now I have decided to leave the shallows as were. After all got cleaned I have filled the mini pond back up with clean water. I have placed a basket with new MINI water lilies in the bottom and put fish back in the water. So far none of them got gold so I had to postpone my wish. Yet the water was still not looking very clean so I started looking for a water pump with a filter.
Mini Pond Filtration
I had a hard time finding the right filtration for a mini pond in local supermarkets. All of them were for more than 260 gal large ponds. Finally in a specialized pond store I got aquarium filtration pump Atman’s CF-600 from 13 to 40 gal. (CF-800 which is up to 66 gal would have been better for fish but of course it wasn’t available). It is probably not best for outdoor use but I have made a protective shelter behind the Hydrangea and I closed the plug in an outdoor power cord protector. I still had to clean the filtration regularly before it cleaned the water completely. Of course for the winter I clean the filtration and store it inside till the spring.
I am already planning a better and bigger pond. With a small wooden pier, like I had in Brno.
One thought on “New Mini Pond”